
If you're one of those talented people who just "gets" stuff, go away. This is for the rest of us. I struggled and struggled and read online and got frustrated and almost gave up on trying to do this. The other day when I was messing around, it finally all clicked. It's so easy it was amazing! If I can do this, YOU can do this too! I recommend ALWAYS having the LYS wind yarn for you, but if you're like me and get yarn from a secret pal, or as gifts from family, or from online stores and you don't have the cash for a swift and winder, here's how to do it!
The first thing to remember is DON'T WIND YOUR YARN TOO TIGHT.... Click on any of the photos to see bigger images.
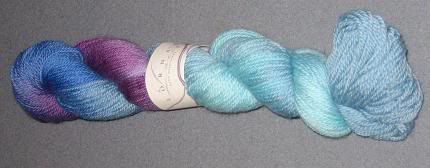
STEP 1: Start with some lovely yarn
STEP 2: Untwist yarn and cut any pieces where it's tied together.

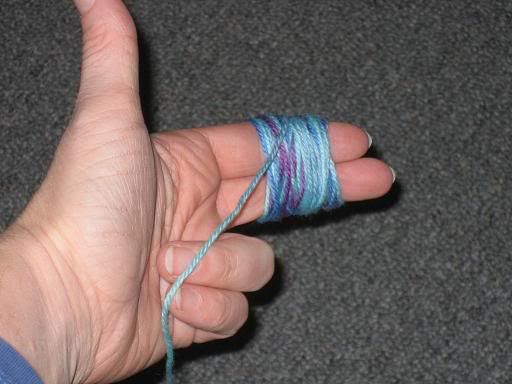
STEP 3: Either leave yarn on floor or use the back of a chair, a loved one's arms, or your feet to spread out the yarn in a big oval. (my arms get tired unless I wind from the floor). Wrap the yarn LOOSELY around your two fingers of one hand. Once you get good at this, you can keep the tail tucked between those fingers and hang onto it throughout the process. I'm not quite there yet.
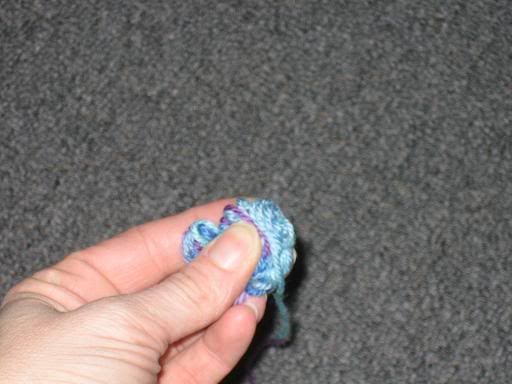
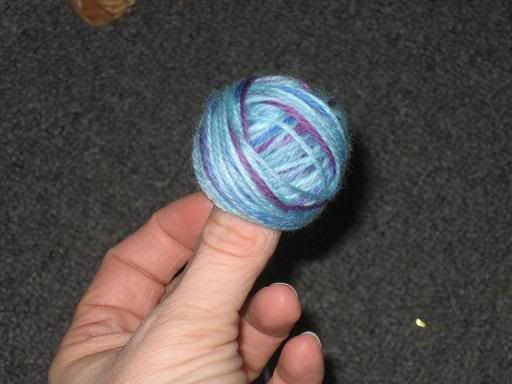
STEP 4: Pull the yarn off your fingers and squish it between your thumb and fingers, this is the wad or guts that you will start knitting from.
STEP 5: Begin winding yarn LOOSELY around the wad, do about 8 wraps before changing direction. I try to do it diagonally and only move the yarn a little each time as I go. Your goal is to have a smooth ball to pull from, so don't do too many big moves like sideways then up & down and back, try to meander across the ball with your yarn. Remember sewing classes LONG ago where you had to wind your bobbins on top of the sewing machine and it would wind its way up and down gradually? That's what you want here. YOU MUST KEEP YOUR THUMB ON TOP OF THE WAD THROUGHOUT THE WHOLE PROCESS!!!
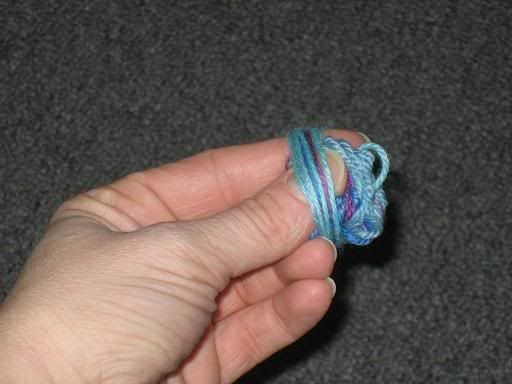
STEP 6: Continue wrapping with thumb still in center of ball, make sure you don't wrap too closely to your thumb, as you want some room there.
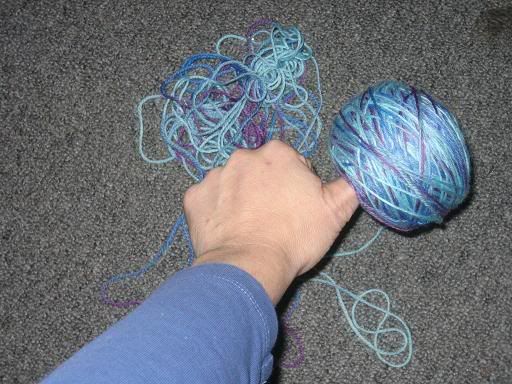
STEP 6 1/2: Still wrapping, make sure to go slowly when pulling your yarn from the oval as it has a tendency to get all tangled up at the end. There was a bit of cursing at this point (see the yarn all piled up as it should NOT be...) you can take your thumb out, just stick it back in the same spot and keep going after taking out any knots you encounter. At this point in the process I always say the nursery rhyme Little Jack Horner, sat in his corner......stuck in his thumb and pulled out a plumb...." At that point my children roll their eyes and leave the room.
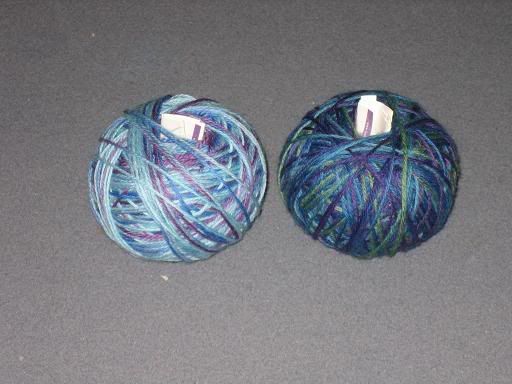
STEP 7: Tuck the last tail outside on the bottom somewhere, fold up the yarn tag and put into the hole from your thumb, and admire the thing of beauty you have just created. Bring your children, husband, or significant other into the room to bask in your glory. Ignore rolled eyes and comments that the nursing home isn't far away. You did it, You are an amazing fibre queen (or king as the case may be).
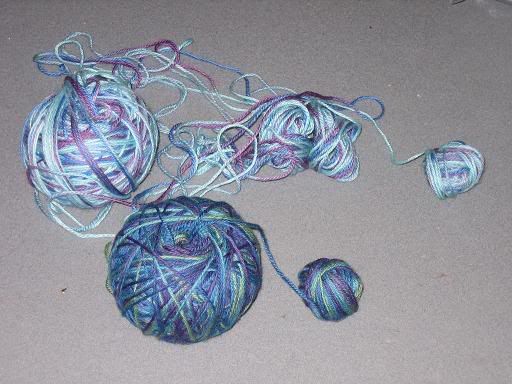
STEP 8: Using the yarn...this is the true test. Take out yarn tag, stick your thumb and a finger in there, wiggle around and pull out the very center part of the ball. If you wound too tightly (as I did in the yarn pictured) it will be a mess. Cursing here is allowed. Don't give up, wiggle that thumb around a bit more harshly and keep pulling, you WILL find the little wad of guts you started with. Just keep unwinding and knit from the guts until you get to one yarn strand coming from the ball. If you did it perfectly or if you are a truly gifted person and still had the little tail, it should go smooth as silk. Knit or crochet your little heart out.
You will get better with practice. These are really lovely and look beautiful set out in baskets as home decor too!


|